Extend WiFi with an ESP8266
You can download our e-book ‘Learn Arduino from Scratch’ from this link
The ESP8266 is known for it’s powerful features and performance despite its small size. However few knew it could act as a WiFi extender/repeater. From previous lessons, we learned how to make the ESP8266 act as both a station and an access point. Now we are going to use that functionality at the same time with a little twist. Unfortunately the standard firmware is not capable of forwarding packets between the local network (the network which is hosted by the ESP8266) and the intra network (the network which the esp8266 is connected to). That means we need a custom firmware which luckily someone on Github managed to do. The source code is public and open source. However, we need not edit any code. When we update the new firmware we are ready to go (almost).
Part 1: Flashing the ESP8266 with a custom firmware.
Step 1:
Start by navigating to https://github.com/martin-ger/
Step 2:
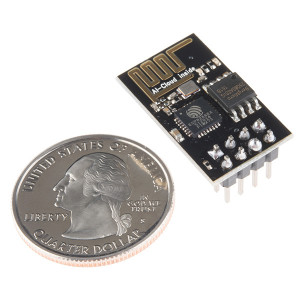
Grab an ESP8266, connect it to your computer for flashing, so you need to bring GPIO0 down by grounding it.
Step 3:
Now head to the Espressif website https://espressif.com/en/
Step 4:
Set settings detailed in this diagram
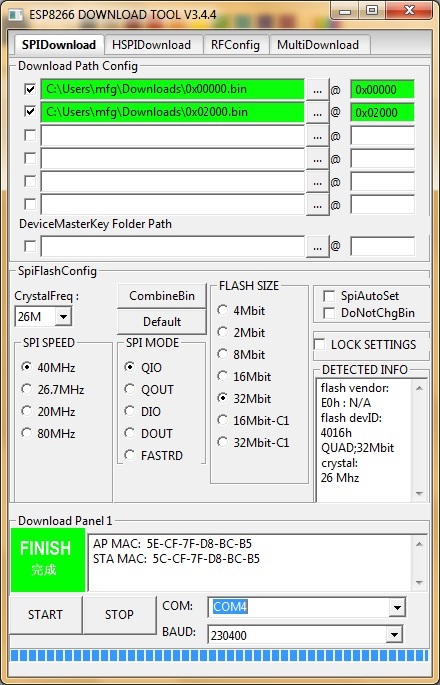
Remember to replace 0x10000.bin for 0x40000.bin when using ESP-01 boards. Check if the esp8266 is being
Step 5:
Hit Start and let it flash…. until it has finished. It will take a few seconds to flash.
Part 2: Setting the ESP8266
Use the IDE Serial monitor. Set the COM port of your ESP8266 and set baud rate at 115200.
The following is a list of commands to use. I have noticed that the ‘help’ command is empty for the ESP-01 versions.
- help: prints a short help message
- show [config|stats]: prints the current config or some statistics
- set [ssid|password|ap_ssid|ap_
password] value: changes the named config parameter - set ap_open [0|1]: selects, wheter the soft-AP uses WPA2 security (ap_open=0) or no password (ap_open=1)
- set ap_on [0|1]: selects, wheter the soft-AP is disabled (ap_on=0) or enabled (ap_on=1)
- set network ip-addr: sets the IP address of the internal network, network is always /24, router is always x.x.x.1
- set speed [80|160]: sets the CPU clock frequency
- set vmin voltage: sets the minimum battery voltage in mV. If Vdd drops below, the ESP goes into deep sleep. If 0, nothing happens
- set vmin_sleep time: sets the time interval in seconds the ESP sleeps on low voltage
- set config_port portno: sets the port number of the console login (default is 7777, 0 disables remote console config)
- portmap add [TCP|UDP] external_port internal_ip internal_port: adds a port forwarding
- portmap remove [TCP|UDP] external_port: deletes a port forwarding
- save [dhcp]: saves the current config parameters [+ the current DHCP leases] to flash
- quit: terminates a remote session
- reset [factory]: resets the esp, optionally resets WiFi params to default values
- lock: locks the current config, changes are not allowed
- unlock password: unlocks the config, requires password of the network AP
- scan: does a scan for APs
- monitor [on|off] port: starts and stops monitor server on a given port
Now let us try to connect to our network and extend our network using the ESP8266. Our network is ‘runtimenet‘ password ‘helloruntime‘.
In order to configure the ESP the following commands should be executed.
set ssid runtimenet
set password helloruntime
Configure the AP we want to broadcast:
set ap_ssid mynewap
set ap_password newpassword
set ap_open 0
set ap_on 1
Then save the configuration to flash.
save
Now give it some time and it will connect to the network. You will also notice you can connect to its WiFi named ‘mynewap’ with password ‘newpassword’.
Make sure the ESP is connected to your main WiFi network. If so, try to connect with the ESP and once connected you should be able to access the Internet via your ESP8266.


Nice work, Can ESP used as wifi load balancer to increase total internet bandwidth,
If yes can you make article or post some hints how to..
i have the problem.
after i flash my esp8266 and when i open ide serial monitor (in arduino) my esp8266 start blinking (blue) fast and ide serial monitor stop working (it displays a lot of strange letters).
i have “NODEMCU Amica” ESP8266MOD ESP-12E MODEL VENDOR
Sorry for my english, thanks!
where is IDE serial monitor
or cmd
plz help
Hi,
You mentioned “In case you have an ESP-01 navigate to folder “firmware_sdk_1.5.4” and download files ‘0x00000.bin’ and ‘0x40000.bin’.”
But I can’t find those files. Where are they?
Thanks for this. Exactly what I need to get an MQTT extension out to my chook house. Connected this to my home access point via the gui @ 192.168.4.1