Arduino and OLED based Cellular Automata
You can download our e-book ‘Learn Arduino’ from this link
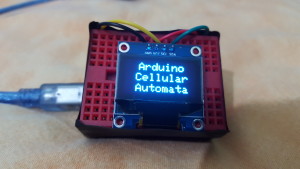
This project uses an I2C 128×64 OLED to display a tiny cellular automata powered by Arduino Nano.
Prerequisites
- 2x half size breadboard (ebay)
(or 1x standard)
- 1x Arduino Nano (ebay)
- 1x OLED I2C 128×64 (ebay)
- 4x Jumper Wires (ebay)
Assumptions
During this tutorial I will assume that you know what an Arduino is (o_O) and you know how to use the IDE and upload simple sketches. I will also assume you know a little programming preferably C programming.
So lets get started!!
Background
What is Cellular Automata? I will explain 1 type of cellular automata which is the Game of Life by John Conway. It is a grid or cells each having 2 states True of False/on or off/alive or dead. These cells are governed by 2 simple rules:
Rule 1: A cell which is dead and is surrounded by exactly 3 alive cells, will be born
Rule 2: A cell which is alive and has either 3 or 2 alive cells will remain alive, else it dies
Simple, no? If you need more information make a little visit to the Game Of Life or Cellular Automata on Wikipedia.
Circuitry
So hook up the Arduino and OLED LCD to the breadboard and start wiring.
- Arduino —– OLED
- 3.3v ———— VCC (pay attention to your OLED voltage requirements)
- GND ———– GND
- A4 ————– SDA
- A5 ————– SCL
Then I attached both breadboards back to back and created a small TV 🙂


Programming the sketch
In order to facilitate (and make it possible) to play with the OLED display, we will be using 2 libraries from Adafruit. If you don’t know how to add libraries please visit https://www.arduino.cc/en/Guide/Libraries
- Adafruit GFX library which will be used to handle all graphics and text displayed on the OLED https://github.com/adafruit/Adafruit-GFX-Library
- Adafruit SSD1306 library which basically is the driver for our OLED. This library works only with OLED SSD1306 128×32 and 128×64 https://github.com/adafruit/Adafruit_SSD1306
The sketch can be downloaded from our github: https://github.com/klauscam/Arduino-Cellular-Automata/
Some explanation
On line 51 with code
display.begin(SSD1306_SWITCHCAPVCC, 0x3C); //initialize with the I2C addr 0x3C (128x64)
the address, which is the 0x3C might be different. I searched for the most obvious and tried a few before getting it to work.
Working Product
The visible horizontal lines are the result of refresh rates of the OLED and the camera.
If you require some help with the code or anything, please leave your comments in the comments section below.
Thanks


Hi,
very interesting project!
Some time ago I got my Piccolino via Kickstarter:
http://www.piccolino.rocks/piccolino-documentation/
I think this should be the perfect platform since it’s already an integrated solution with display and peripherals. Unfortunately I didn’t find the time for playing around with it. So this could be my first project …
Diet
I have implemented your project on Ardafruit TFT ST7735.
https://youtu.be/aBGGUiejdrI
Changes:
…
grid[27][22]
…
and ST7735 Library do not like Integer as color and write it so:
uint8_t color = grid[x][y];
if (color==0)
{
display.fillRect(6*x, 6*y, 6, 6, ST7735_BLACK);
}
if (color==1)
{
display.fillRect(6*x, 6*y, 6, 6, ST7735_WHITE);
}
Pretty educational….looking forth to coming back.
If you would like to speed it up, have a look at my blog post:
https://bitbanksoftware.blogspot.com/2018/05/fast-ssd1306-oled-drawing-with-i2c-bit.html